Tuesday, March 25, 2014

Tri-X in the Rain


I complain a lot about the weather as an excuse for not being out taking photos.  This winter was particularly cold and awful and all I really wanted to do was get from point A to point B as soon as possible with my head down.  However, inclement weather -- particularly rainy days -- is actually great for photography.


It puts people in a mood, which is more emotion than you get from them on their normal commute to work.  Peer under people's umbrellas and into the shadows under their hoods and you'll realize you're not the only one thinking, "I just want to go home."

There's that, but there's also what rain does to stuff.  The overcast sky becomes a gigantic softbox, and the rain lights up every surface up with slick, contrasted texture.  It pools up in cracks and beads up on plastics and puts an edge on even the smoothest curves.


Also, I get to push my film because it tends to be darker out.  All the entries today were shot on Kodak Tri-X 400 film, pushed two stops to ISO 1600.  Basically, you make the film more sensitive.  I have an f/2 lens on the Bessa, and could have shot this wide open with reasonable shutter speeds, but I like having a smaller aperture when I'm out and about.

Also, it changes the look of the film.  You get higher contrasts and more pronounced grain (kind of like you do when you push a digital sensor).  Think about the grainy black and white behind-the-scenes photos from film sets, where everyone is sharply defined, and Kubrick's beard becomes a blob of black on his throat.


To be honest though, the grain is not a huge deal under proper exposures.  It's only when you zoom in or enlarge a photo for a newspaper that it becomes noticeable, and let's face it, everyone reads on a smartphone nowadays anyway.  Also, Instagram happened and "the film look" became perfectly acceptable, after people spent decades of research digital sensors and modern film emulsions to get rid of the grain.


Anyway, next time it rains, grab the camera (and maybe a lens hood) along with your umbrella.  Maybe you'll start seeing some of the stuff you've been missing out on.

Sunday, March 9, 2014

At the Beach with the Horizon Perfekt


A while ago, the ICP Infinity Awards put together a piece about Jeff Bridges and his Widelux Camera.  The Widelux was produced in Japan from around the 1950s to around the 1990s, and The Dude carried his with him on set.  The above shot was taken on my Horizon Perfekt, which works exactly the same way -- the main differences being the hideous molded plastic body, a 120 degree FOV (instead of 140), and maybe some different shutter settings.  Oh, also, it's made in Russia.


The way it works is pretty neat.  There's a barrel on the front of the camera that houses a little f/2.8 lens. When you hit the shutter, it sweeps across the frame.  You actually have to kind of pinch the camera at the top and bottom to hold it; if you try to hold it like a regular camera, you risk getting your fingers in the shot. There's actually a little bubble level in the viewfinder because if you don't have it level, your horizon gets really weird and bowed.  There's no actual shutter per se.  When you set the shutter speed, it just varies the width of the strip being exposed.

Aside from the actual shutter speeds, there are two modes you can set this to -- fast and slow.  In fast mode, the lens snaps from one side to the other.  In slow mode, it takes about 3 seconds.  You can either put it on a tripod, or you can just hand hold it and make some cool stuff happen in the dark.  As Jeff Bridges mentions in the video, you can handhold this camera at 1/15s on slow mode, because only a small strip of film is being exposed at any given time.


Inside the camera, the film travels along a curved path that keeps it the same distance from the lens all through the arc.  This is how it stays nice and tidy from corner to corner without having to worry about aberrations or anything.


Here's what the developed frames look like.  They're almost twice the size of full 35mm frames.  As you can see, sometimes the film advance has issues and you get slightly overlapping frames.

Anyway, while taking pictures, I actually managed to break the film inside the camera.  I tried to advance the film and I didn't realize my thumb was on the rewind knob on the left, so the film snapped and the day was over.  I had to get home to the darkroom to unload the stuff that I did manage to take and develop it.  There were some shots I really wanted, too, but didn't make it.  Anyway, here's some of what I managed to rescue:


Now, the last thing I want is for this to turn into a gear review blog.  You'll notice I've been really careful about getting really into specs and image quality.  I really want to just focus on all the different ways there are to take and make a photo.  All through photography's history, people have been coming up with weird and zany ways of capturing light, and they don't always end up with the sharpest photo.  

The reason I shoot film is that it makes exploring all these ways a lot more affordable.  That's not to say that I'm really saving a lot of money, per se.  Every dollar I'm not spending on a digital sensor is going towards another kooky camera. 

And, yeah... I've been spending a lot of dollars.


Sunday, March 2, 2014

Business Cards and Contact Printing


When I went to the Krappy Kamera reception a few weeks ago I met a lot of really cool people, most of them photographers.  They kept handing me their business cards, which was really cool because I never had a chance to talk to professional photographers before.  Unfortunately, I had nothing to offer in return except for, "Well um, I have this little blog with [back then] 5 posts on it."

So, I needed business cards but I had no idea how many I needed -- my biggest fear is having a stack of 500 printed and then never handing any of them out.  I'm dreading the day when I'm old and broken and I find a dusty box in the attic with 498 pristine business cards, a reminder of that time when I thought I'd make something of myself.

I'm just kidding.  I'm having a blast with this blog, and I'm getting great feedback from people, and I'd love to have something to give to people I meet to direct them here.

Today, I printed 64 business cards.  In the darkroom.  These will basically be my rookie card.  If I ever make it big (haha), there's no way it would be at all practical to continue doing this.  Here's how I did it:


This will be a contact print.  Basically, you stick something transparent on a piece of photo paper, weigh it flat with a piece of glass, expose it to light, and get a negative image.  All the transparent parts go black and all the opaque parts go white.  If you do this with negative film, you get a negative of a negative, which is a finished photo.


I printed out the guidelines and text on transparency paper (this was the only digital part of this process), and laid some negative frames on top of it, with a dab of glue on a corner of each one to hold them in place.

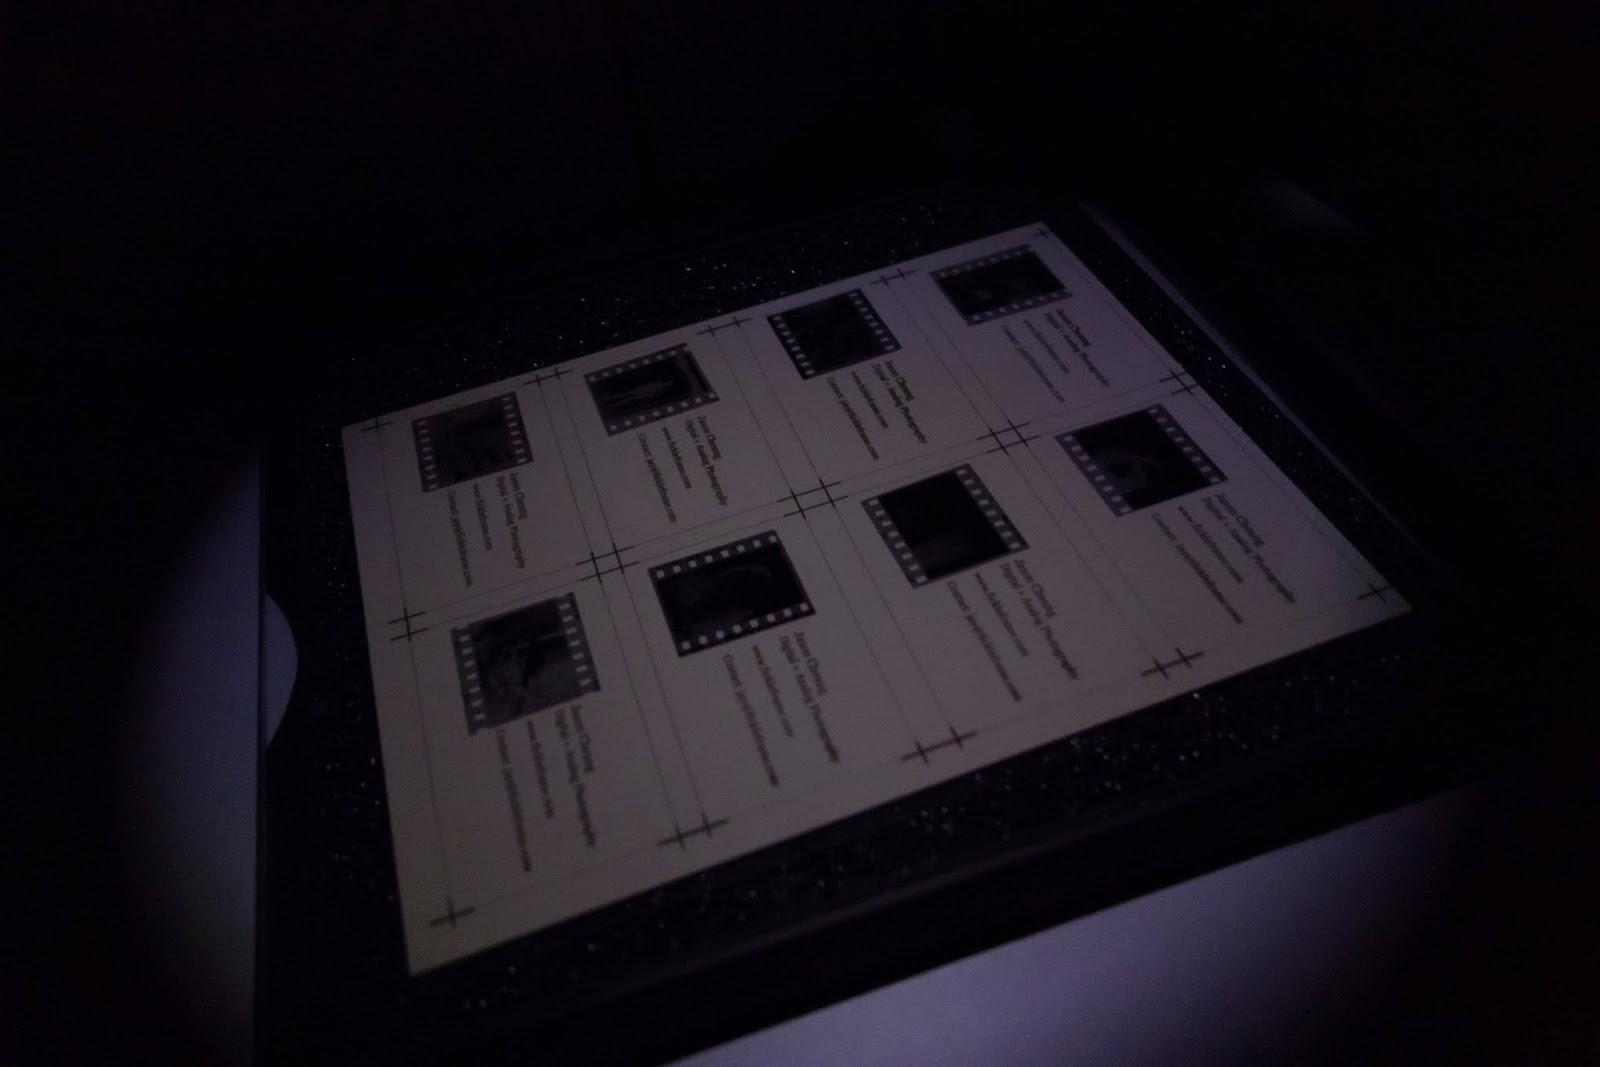
Then I turned off the lights and put everything on top of a piece of photo paper, and put that into my contact printer.  A contact printer is basically just a heavy piece of glass on a hinge.  It holds everything completely flat (in contact, hence "contact printing") with each other.  If anything isn't perfectly flat, it comes out blurry.

In the old days, sometimes press photographers would set everything up in their hotel rooms, and then flick the lights on for a certain amount of time to expose their contact sheets (more on contact sheets later).  I used the enlarger though, because there's more control over the process because I can use a timer and a contrast filter.


And then from here, it's like wet-printing any other photo.  It goes in the developer, then the stop bath, then the fixer, and it's ready to hang up and dry.


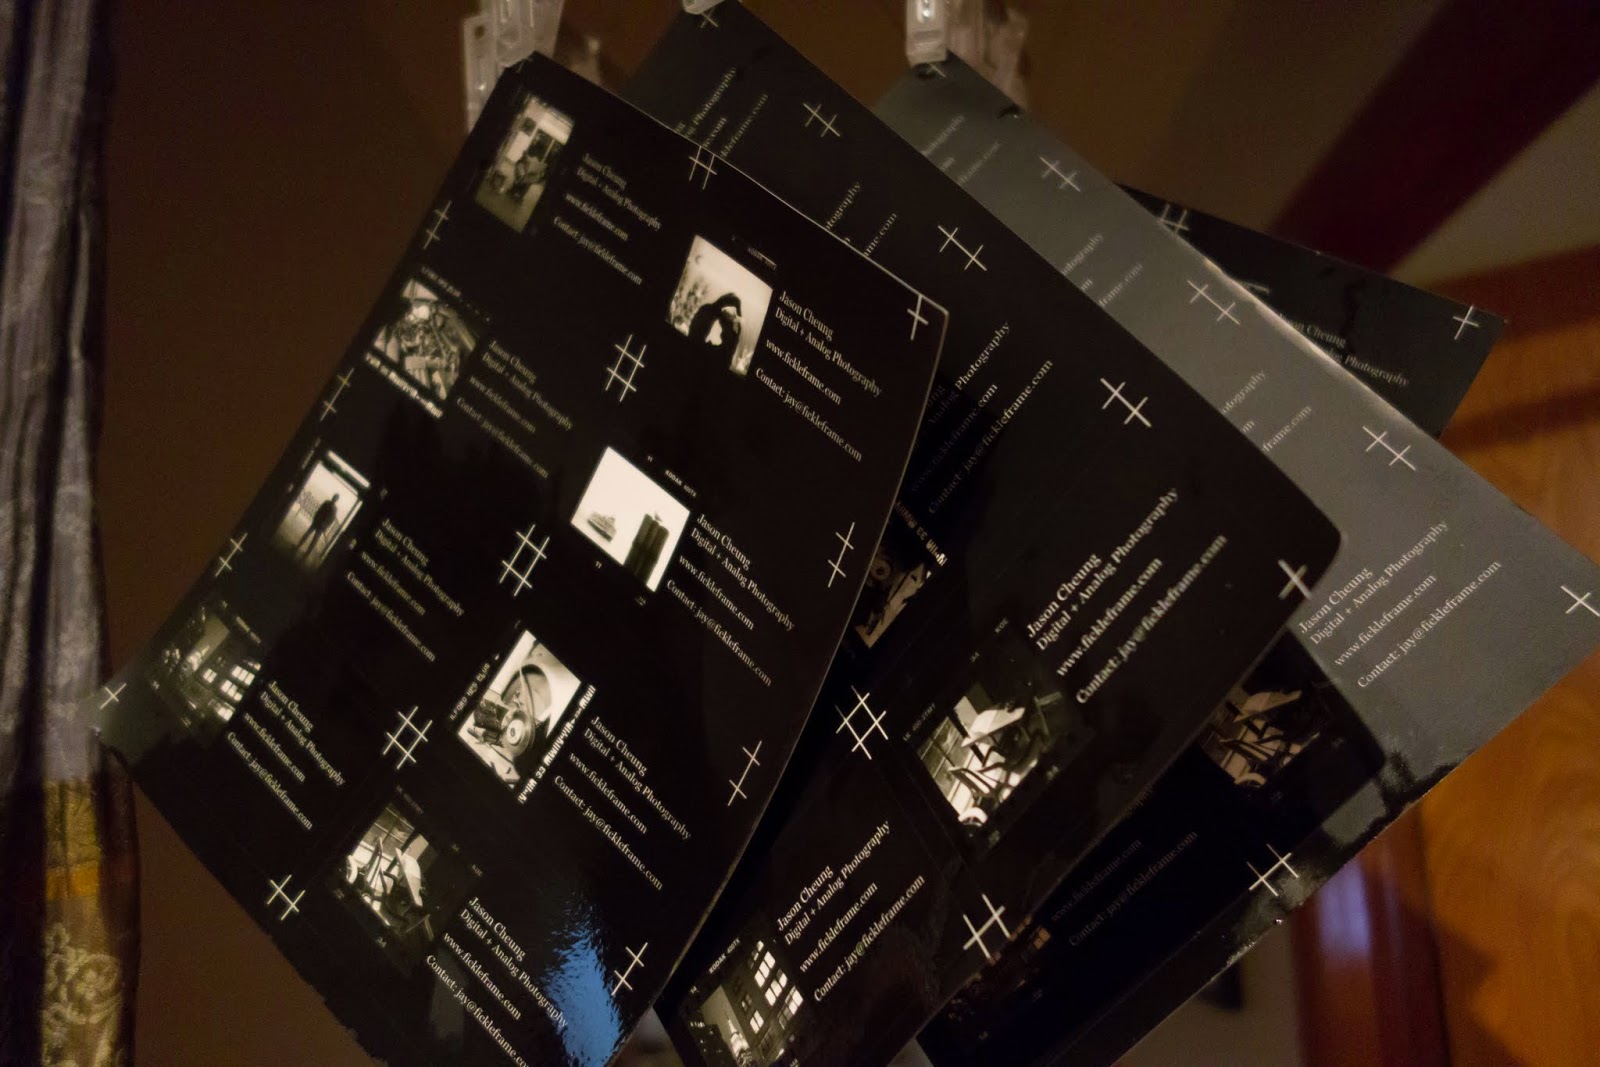
There are two types of photo paper -- fiber-based and resin-coated.  The woman I bought my enlarger from included a big stack of old, unexposed fiber-based paper.  I've been avoiding it because it's old, but I figured I'd finally put it to some use.  Fiber-based paper yields better image depth over resin-coated, but it curls a lot as it dries.  By the next morning, if left to hang freely, these papers will be rolled up like cannolis.


So, I had to weigh them down with something until they dried.  What better than this:


Remember when I mentioned contact sheets earlier?  Contact sheets are when you cut a roll of negatives into strips and contact print them all together so you can inspect them in positive form.  Here's one of mine from when we went to Blue Hill at Stone Barns and went for a walk around the farm:


Disclaimer: my contact sheets are not nearly as organized as Magnum's.  They're completely out of order and some strips are upside down.  Not to mention, the photos aren't nearly as good.

Anyway, Magnum Contact Sheets is a collection of a whole stack of Magnum Photos' contact sheets.   The book is gigantic, and perfect for flattening prints.  You'll see contact sheets from big names like Robert Capa and Henri Cartier Bresson along with tons of others.  It's great because it includes the photos in between the iconic photos that have made history.  

Originally I was thinking, "these guys can't just be shooting keeper after keeper, roll after roll." but that's just what they did.  This book is the highest density of photography per cubic inch you can ever experience in physical form.  If you're remotely interested in photography, or how it's made, you should definitely have a look at this book.  Just be prepared to lug home 8 pounds of photography.